Most studio photographers already know the lighting technique using several flashes. This is the basics for them. But when you talk to wildlife or nature photographers, flash is considered anathema. And who could dispute this? Using a flash set on top of the camera will immediately lead to flattening the model with a crude light. Wildlife photographers are now used to never shoot in such way, like never under the mid-day sun. This would always produce unnatural and unpleasant pictures.
But it is quite possible to have nice images if you accept the accumulated requirements of a technique ignored by most: multiflash. Even better, for fast-moving subjects, the flash is the only way to stop the movement; Nevertheless, you’d want to render this more elegant, more discrete and ensure that it renders the subject to its best.
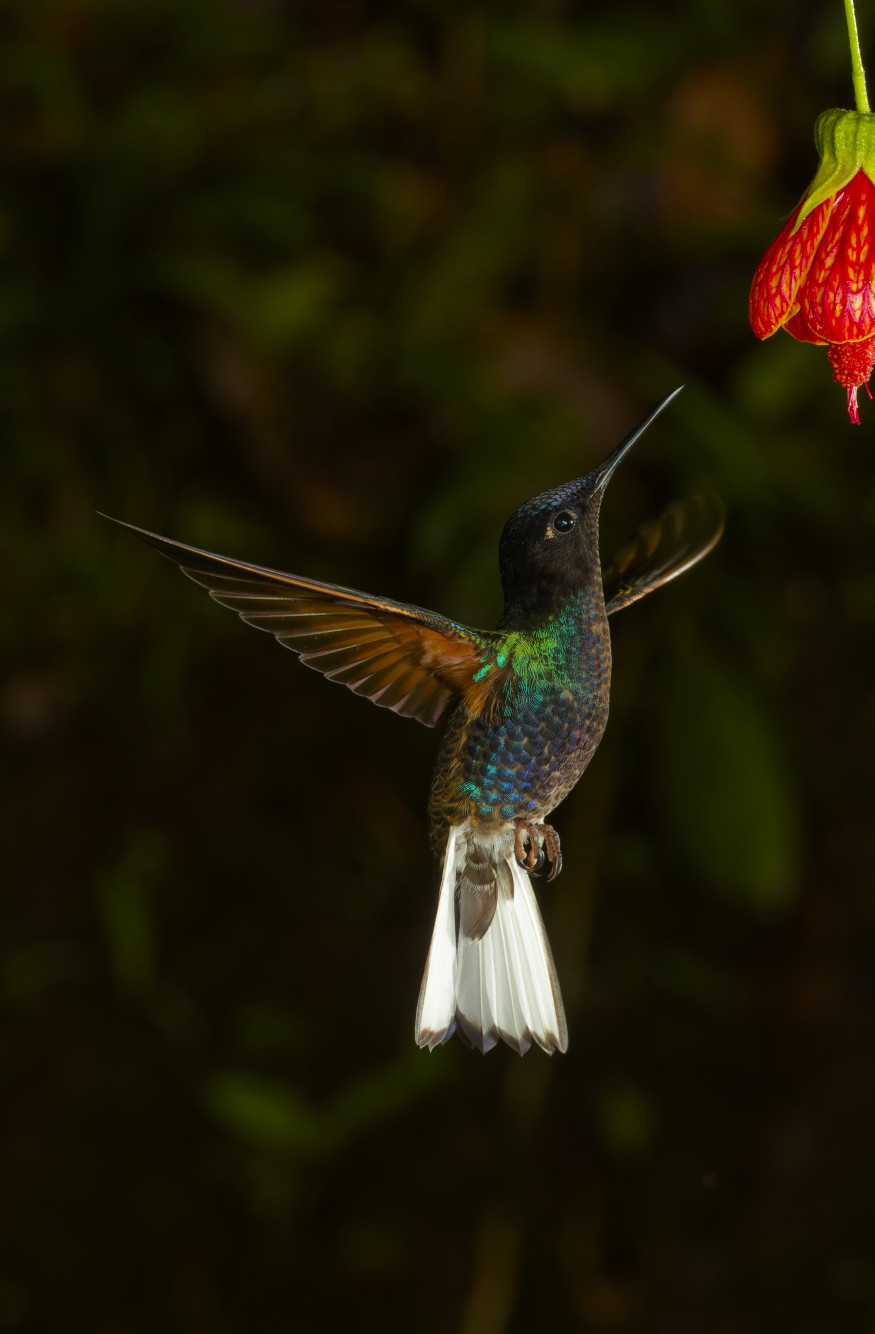
Example in hand: Hummingbirds. Impossible to stop wings when they beat between 20 and 80 times per second. Even 1/8000s is squarely insufficient if it does not catch the wing immobile either in high or low position. But, while a big fat flash shot solves the problem once and for all, you get a picture with a splash of white light, and shadows drawn from the light’s axis. Solution: several flashes (hence the name: multiflash).
As a matter of factn using several flashes is not simple, as any studio photographer will tell you. But you will quickly discover that it is all a matter of handling the balance of several items that I could (too?) quickly summarize with:
- Provide lighting source similar to natural light
- Avoid ugly shadows with additional sources
- Provide a setting that enhances the subject
These are three axis I want to follow here. It will not make you an expert. But it may give you some leads to experiment in a more ordered way, if you want to identify the best parameters quicker.
Preliminary conditions
One critical requirement when setting up this technique is often not obvious: Ambient light. It’s too easy to forget that outdoors light is in competition with your flash lighting setup. So, you must start from a relative dark ambiance. To the point that it would feel insufficient for photograph (without a flash).
So, even in the wild, you must set everything up in the shadows. A roof, an awning, a dense tree above, a forest. All is good, since we will want to work with relatively low flash power (often 1/32 power, or even lower). So, te ambient light must be too dark for photo. If not, you risk mixing both lights and getting some kind of ugly “double exposure” in one shot (sometimes confused with a lack of focus).
When shooting at hummingbirds, feeders will be set in darker places, under a tree, or even in the forest shadow.
Natural light
The first objective will always be to try and get a setup which can be considered more natural (or relatively natural). Main light sources must always come from above (the sun shines from above).
Avoid big light from under the subject. The picture would feel weirdly unbalanced.
Soften the shadows
But since a flash will often produce a very harsh light, it is recommended to compensate this with secondary softer light sources to lighten the main shadows (more or less below and opposite to the main flash source).
You may be tempted to avoid adding flashes and use reflectors or soft source like studio umbrellas. The biggest issue is that even a single (usually) black flash is already perturbating animals/birds behavior. Opening a white reflector of 1 meter diameter (or more) and studio umbrellas will probably ensure that you never see your model again in you improvised studio in the wild. Not counting the difficulty of installing up large gear in natural settings. At the strict minimum, you will need to schedule some time for the animals getting used to the presence of your equipment before starting a photo op.
Enhance the subject
This starts with the background. Several options are available to you.
- Natural background: Ensure that you have one or several (powerful enough) flash(es) to light the background plants. This may be be tremendously hard if they are far behind. Check and check again to ensure that the appearance is nice and clean.
- Printed/drawn background: If the natural background is too far, too messy or not nice enough, you can try attaching a printed background. In case of hummingbirds, the size is not an issue. I would not try this for an elephant (!).
What to draw? everything is possible but don’t overdo it. Less is often better. Less details, less artificial colors, less artificial shapes. - Black or dark background: If the background is far behind, not lit, or in low light, you will get a very dark background for your model. The is a very good choice to enhance the colors of the hummingbird feathers.
Setting up the camera and flashes
Finally, let’s setup the camera itself.
- Compulsory manual mode.
- ISO 400
- Speed: synchro-X or 1/200 (These are the basic flash settings!)
- Aperture: The flash will freeze the model; In order to favor details you will close the aperture too. Start with f/16.
But, really, it is possible or necessary to vary aperture (and ISO) lightly to ensure the perfect exposure (don’t fiddle with speed, it won’t influence in flash photo).
Your flashes will be set between 1/16 power and 1/128 power, in order to allow fast recharge cycles (a short 3-to-4 picture burst must not be interrupted by flashes recharging between actions).
The balance between the various flash lights is a combination of distance to the subject (it reduces light quantity) and flash power setting. 1/16 for a firm light. 1/64 for the shadows. Combined with distance.
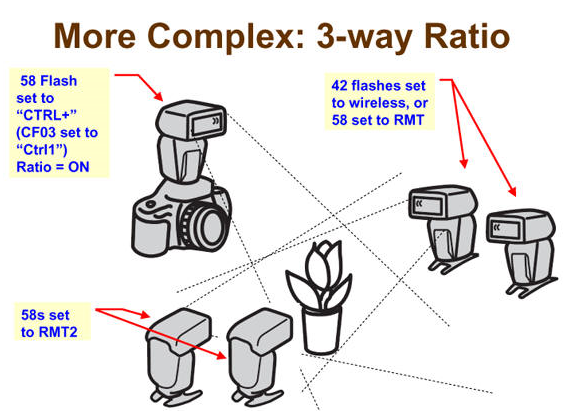
The camera flash (see above) is the Master to control the others (set as Slaves). Generally, you need to use the Wireless mode of the flashes. But it could be even simpler if your flashes can merely shoot when they “see” the main flash light. The easiest setting indeed.
There is a very good paper from Nate Chappell (Multi-flash Hummingbird Photography) that could help understand this specific point. Nate is not only a photographer with a long-researched technique, but he is sharing it with people in his photo-tour company where he is leading bird photo workshops (mostly on the American continents). You will notice that he is using the Nikon SB-26 because they are rugged, powerful, not too expensive, and easy to configure for synchronization with all flashes on the market (including on-camera ones).
This post is certainly too short to explain it all. There is still a lot of space to experiment by yourself (and I recommend this). But I hope it will help you start the journey to multiflash photography of hummingbirds (not in Europe) or of tits (much more common in France) or any other wildlife.
Leave a Reply