Many photographers think that it is enough to take the file just out of the camera to give it to its public. I am deeply convinced that this is a total error, maybe because I started photography in the black-and-white laboratory of the family. Very early, I was able to see that the developing phase (and even more the printing phase) contained many true choices by the photographer (what was eased by the photo lab at the corner of the street silently making those choices for us, and which is now masked the efforts of the digital camera trying to do the same inside the box).
So, many people want to see my photos immediately out of the camera, right after the recording. This is not an issue for me when we are speaking of showing the picture on the back of my camera (Nobody can see anything there, anyway…) but I actively resist when we’re speaking about final pictures. As a matter of fact, I work some more. This is something that ussually annoys a lot of other photographers, but that I consider an integral part of taking a picture (and this is a reason why I switched to digital photography early). First, I sort pictures out in Adobe Bridge. I usually keep only a small part of the images I shot. In a family reunion, I may keep half of the shots (It may vary). From a photo safari, I keep between 1% and 3% of the recorded files. The rest is not really worth it. Your mileage may vary (some will say that I should shoot less and think more, but it’s my style), but you need to select your best pictures.
Then, I enter the real development phase: I work from the RAW picture files of my camera, but this would be near exactly the same from JPEG picture files (I just prefer to start with images less digitally massaged by the camera to reach my own pictures). Consequently, a lot of what I do happens in Adobe Camera Raw (and it applies mostly to Lightroom users too). Here is how I proceed and… why.
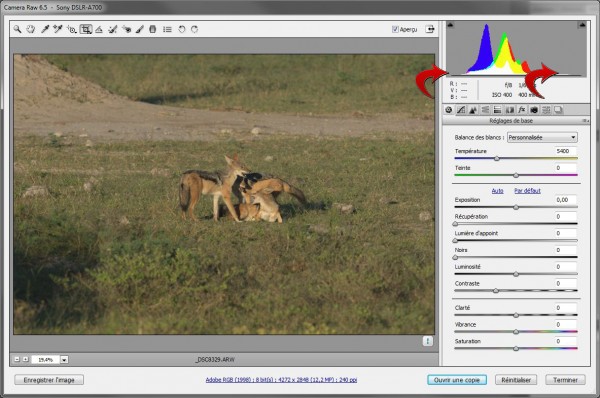
The first thing requires to notice that the histogram of most images does not fully cover the full range from black to white: There is not real black (on the left of the histogram) and not real white (on the right). It may be an artistic choice, but in most cases this is merely a consequence of the limitations of the photo camera.
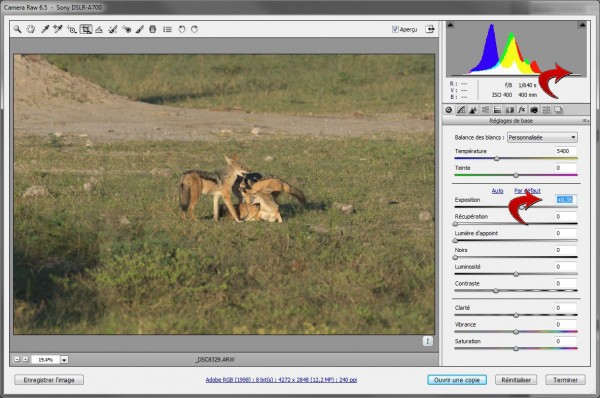
I follow a two-step approach to extend to a full light dynamic range. First, by using the Exposure control to push the highlights to the right of the histogram. Here, I pushed the Exposure to +0.35 to align the last bit of the histogram with the right hand side (I ensured that the white pixels are actually completely white, not light grey and I don’t blow them out).
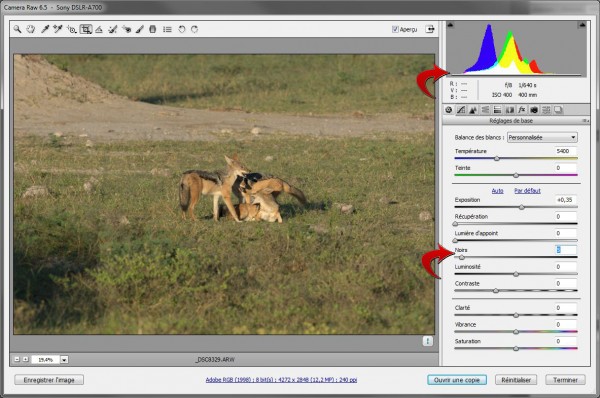
Then, I do the same with shadows (and the left hand side of the histogram) using the Blacks, pushing only a little.
From this point, the picture dynamic range is maximal. It is also possible to correct the contrast, but it is not often necessary if the shooting conditions were average.Similarly, apart from significant problems in the original, it is not necessary to use the Fill light to lighten dark shadows.
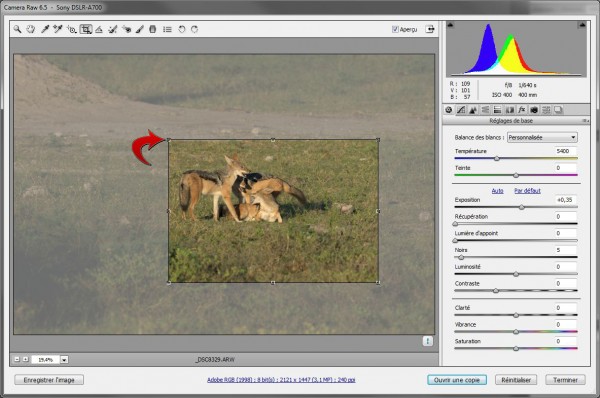
The next step is to re-frame the image: Some will say that I have the bad habit of centering my subject too much, but when we speaking about very active animals, like the three jackals of this picture, I prefer to use the central AF zone of my Sony Alpha 700 which has the most sensitive and fastest AF sensor. So, I leave the re-framing job to Photoshop (even if I recognize that whenever it’s possible, it is simpler to think about framing correctly from shooting time).
For this, I use the re-framing tool in the tool bar at the top of the Adobe Camera Raw window and I choose the right frame with the mouse (thinking about painting traditions and the rule of thirds).
Some will prefer to start the whole process with re-framing (rather than waiting here for this). There are some good reasons for it (specially so when re-framing is used to remove an ugly over- or under-exposed area from the picture). I believe that in most cases, it’s more an issue of personal preference.
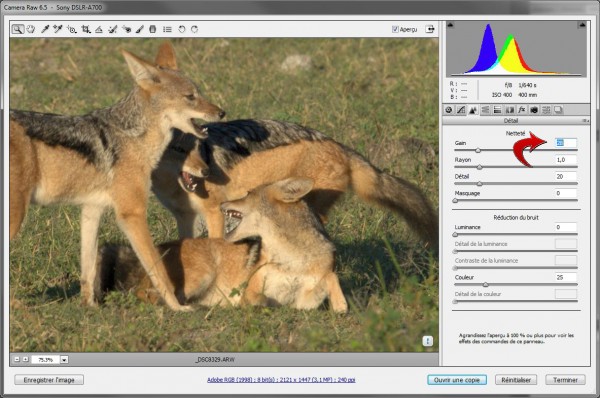
Next comes the most controversial step: Detail accentuation. It is easy to over-do it and I strongly recommend to keep the original Adobe settings rather than stepping all over it with too much accentuation (many people do it and I won’t give names). As a matter of fact, it’s true that I tend to force more of these fake details in web pictures than in quality prints.
The best is probably to experiment very lightly, in the Camera Raw settings, after zooming in onto the important area of the image (I’m less tempted to over-do it when it’s big in front of my eyes).
Then, it is simple to open a copy of the image in Photoshop from the “Open copy” button. It will be necessary to save a fine-tuned copy or to print it on your ink-jet printer.
I simply recommend to always convert colors (the impact is usually small but I tend to have confidence in Photoshop choices).
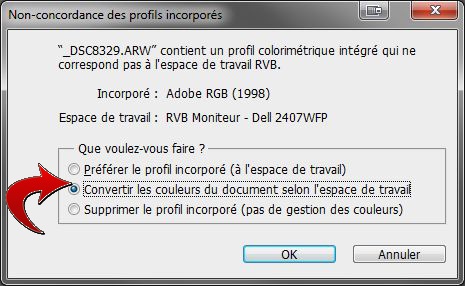
Step 6 - Export to Photoshop
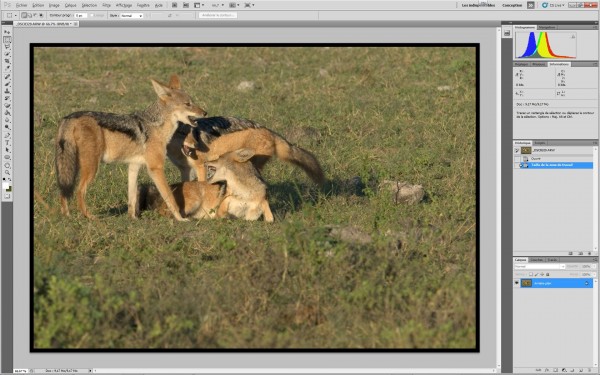
And here is a nice additional step that I get from Patrick Fagot, photographer that I love and whose teachings I used as a basis for my own ideas to use Photoshop, thanks to his advice during photographic trips with did together in Brazil an in Botswana. He advises to immediately add a colored frame to the best photos in order to give them a little additional pro finish and this is true that it help the picture to “pop out”.
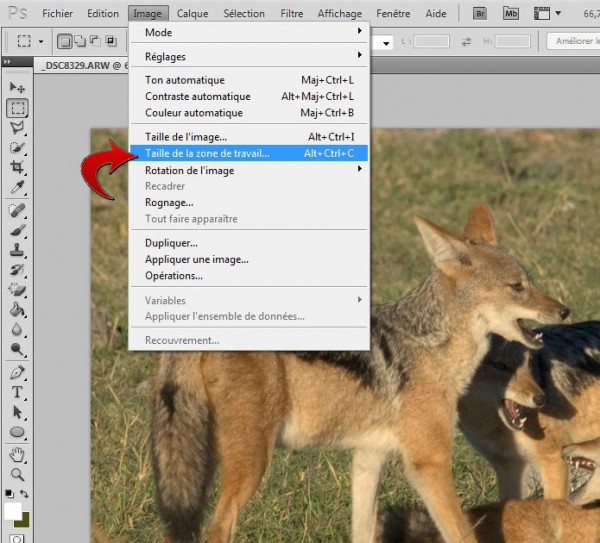
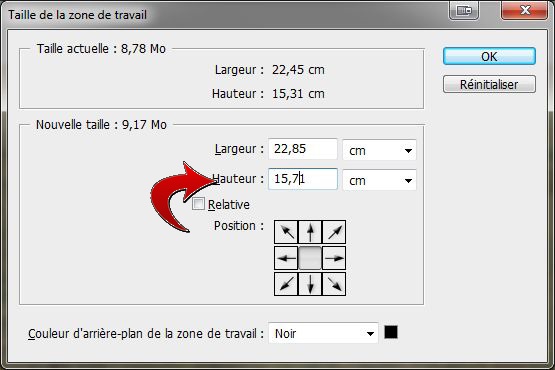
It’s only a matter of using the Photoshop Image > Canvas size... control…
…and to choose a new size increased by a few millimeters around the image (and the right Canvas extension color – Black is often good but you can experiment).
Step 8 - Size the border/frame
Some will prefer the Relative control which allows to give a relative increase size, but I feel it is less comfortable.
From this description, it is possible to change a few settings around this. And I guess this will give inspiration to some of the readers.
If you want to go further: All other tips and tricks of YLovePhoto.
